Setting Up Your Blog
Ready to start sharing your expertise with the world? This step-by-step guide walks you through setting up a professional blog in the CRM - from connecting your domain to publishing your first post. Perfect for coaches, consultants, and service providers who want to establish their authority online.
Fun fact: You can have as many blog sites as you want in one CRM account! That means if you're managing multiple domains or own other businesses, you can house all of them in one place! Talk about efficiency!
Setting up a Subdomain
Just like your client portal, funnels, and websites, we need to set up a subdomain for your blog. This is crucial because it ensures your blog appears on YOUR website (like blog.yourdomain.com.
Step 1: Come up with a subdomain name for your blog's web address. Most commonly used names are blog.yourdomain.com, news.yourdomain.com, etc. You can use any prefix or subdomain name that makes the most sense for you as long as it hasn't been used anywhere else.
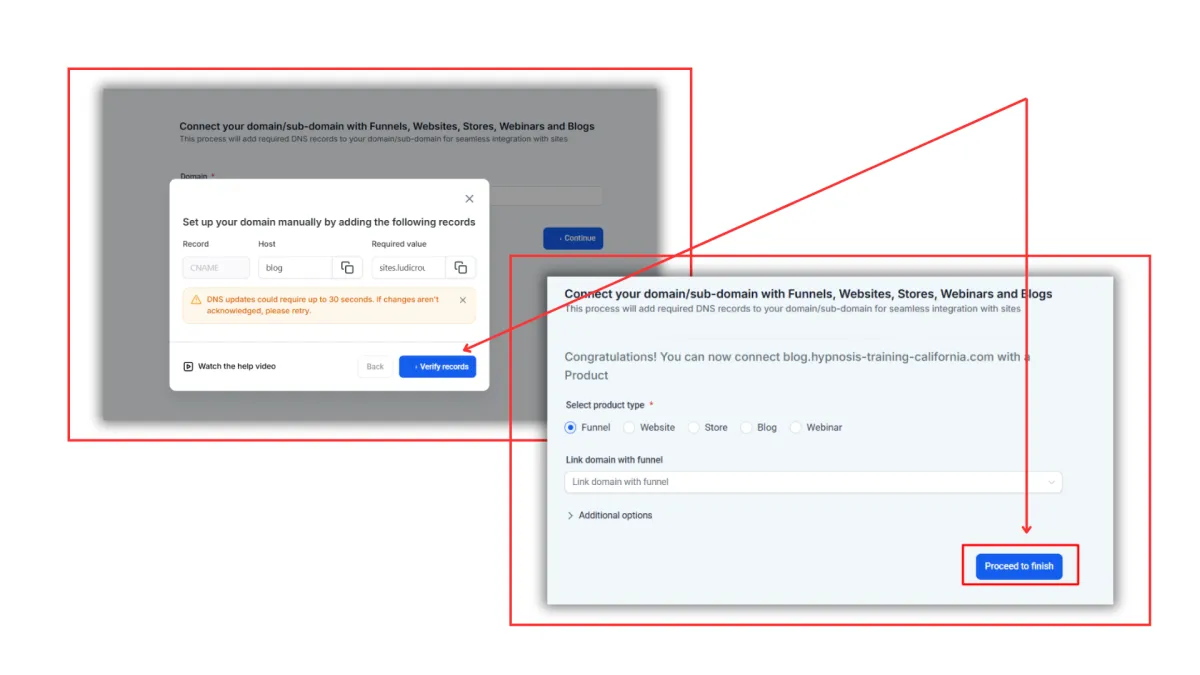
Step 2: Go to Settings > Domains > Connect (Funnel/Website/Store/Blog/Webinar). Type your domain in the box and click on Continue.
A pop-up will open and if you're using GoDaddy or Cloudflare, you can just click on Continue and the system will automatically add those records for you. Otherwise, you can click on "Add record manually".
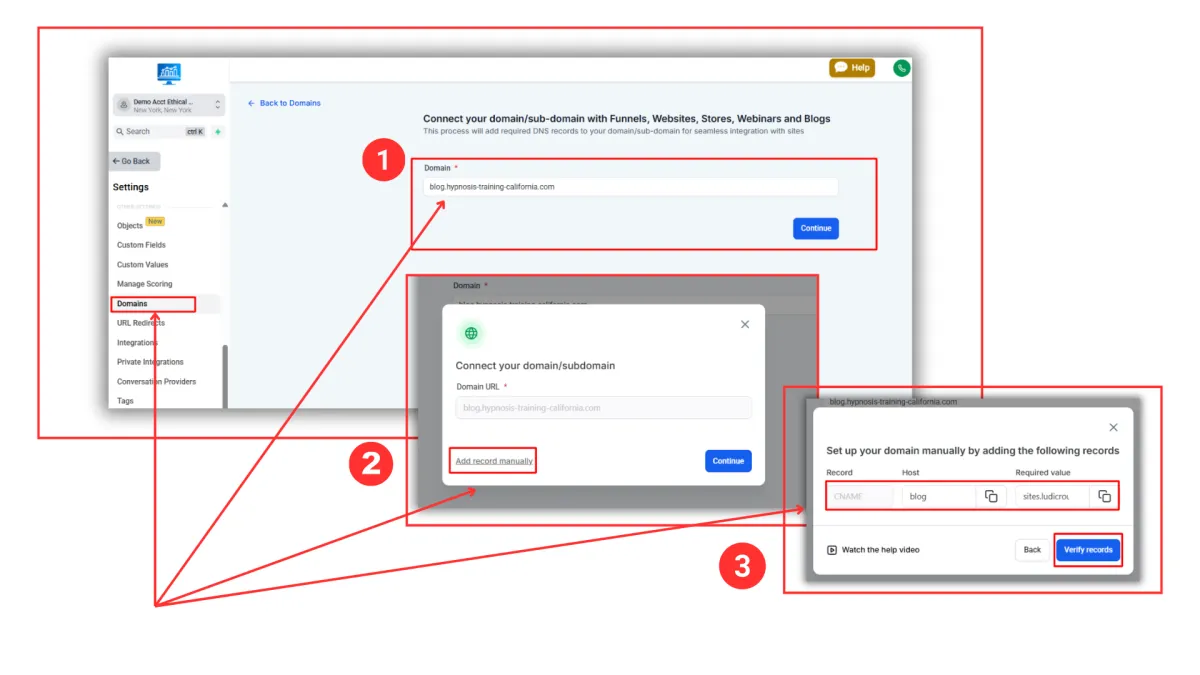
Step 3: Login to your domain registrar, locate your domain, go to DNS, and click on “Add a new record”. Simply copy and paste the records that are given to you by the CRM, and once done, click on “Verify records”. Give it a minute for your work to save.